The BMP TECCO Mesh system represents a significant advancement in slope stabilization, offering a robust solution to geotechnical challenges. This comprehensive tecco mesh installation manual is designed to streamline the installation process, ensuring efficiency and effectiveness from start to finish.
1. Understanding BMP TECCO Mesh System Components
The BMP TECCO Mesh system includes several key components:
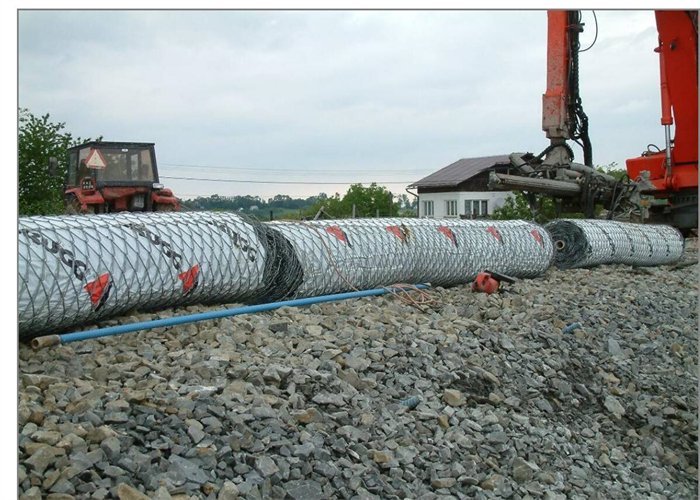
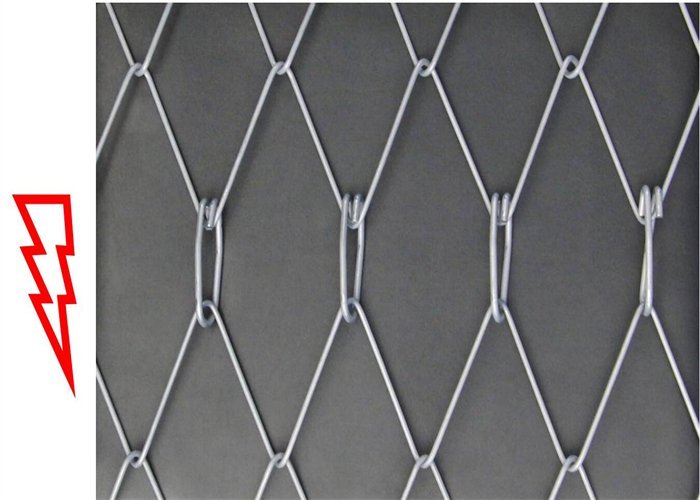
TECCO® high tensile Steel Wire Mesh: Essential for covering slopes, available in rolls for easy deployment (Figs. 1 & 2).


Spike Plates and Connection Clips: For anchoring the mesh to the slope and connecting individual sheets seamlessly (Figs. 3 & 4).
Before diving into the specifics of installing BMP TECCO Mesh for slope stabilization, it’s essential to understand the significance of this system in geotechnical engineering. The BMP TECCO Mesh system is not just another tool in the arsenal against erosion and landslides; it represents a leap forward in how we protect and manage our natural and engineered slopes. Designed for versatility and strength, this comprehensive guide aims to ensure that each step of the installation process is clear, making it accessible for professionals aiming to enhance slope stability effectively. Whether you’re dealing with a steep incline prone to landslides or a riverside requiring erosion control, this tecco mesh installation manual lays the groundwork for a successful BMP TECCO Mesh installation, combining detailed instructions with practical insights to navigate the complexities of slope stabilization projects.


2. Preparing for Installation
Before installing, it’s crucial to prepare the supporting elements:
Boundary Ropes: Secure the mesh’s edges, preventing slippage (Fig. 5).

Rope Anchors with Flexible Heads: Facilitate the tensioning of boundary ropes (Fig. 6).

3. Installation Process-tecco mesh installation manual
The installation involves several stages, each critical to the system’s overall stability:
Stage I: Begin by clearing and leveling the slope as per your project’s requirements (Fig. 7).

Stage II: Stake out important points on the slope, such as nail distances and drilling points, to guide the installation (Fig. 8).

Stage III: Proceed with drilling works and nail installation, anchoring the system firmly to the ground (Fig. 9).

Stage IV: Identify and prepare anchor points, especially in depressions, for optimal mesh tension (Fig. 10).

Stage V: If necessary, install drainage elements to manage water flow and prevent erosion under the mesh (Fig. 11).

Stage VI: As per tecco mesh installation manual To encourage vegetation growth, install an erosion control mat, TECMAT, where applicable (Fig. 12).

Stage VII: Roll out the TECCO mesh, ensuring it covers the intended area fully (Fig. 13).

Stage VIII: Connect individual mesh sheets using the provided connection clips for a cohesive barrier (Fig. 14).

Stage IX & X: Install rope anchors and tension the system to the required specifications using a torque wrench (Figs. 15 & 16).


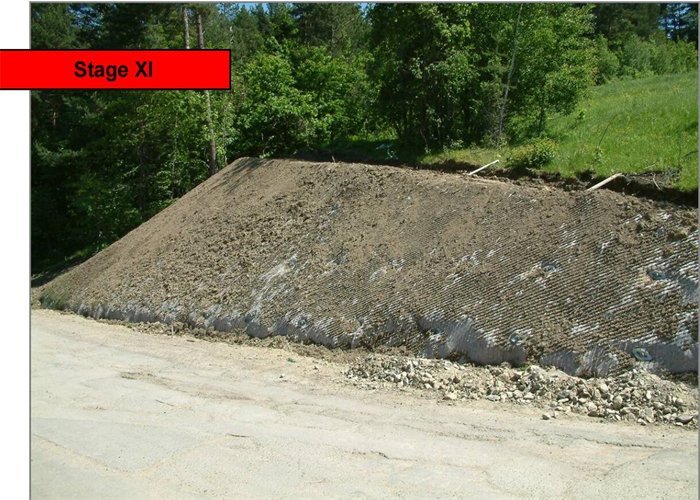
Stage XI: Finally, focus on greening the slope through seeding or hydroseeding, enhancing the system’s environmental integration (Fig. 17).
4. Special Considerations and Additional Tips of tecco mesh installation manual
For difficult slope conditions, specialized drilling equipment may be required (Fig. 18).
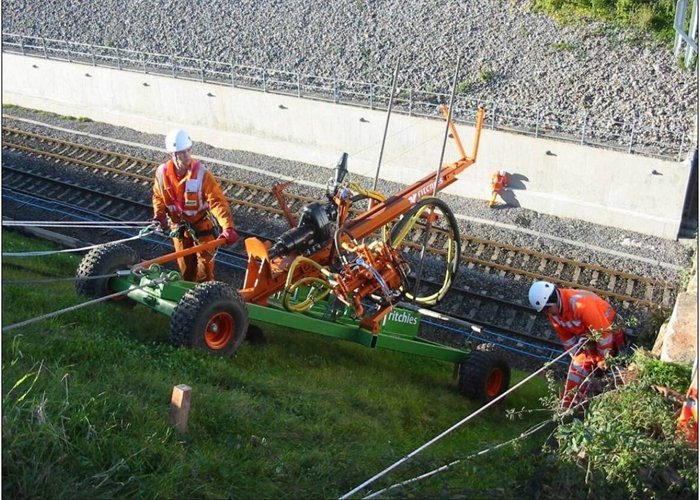
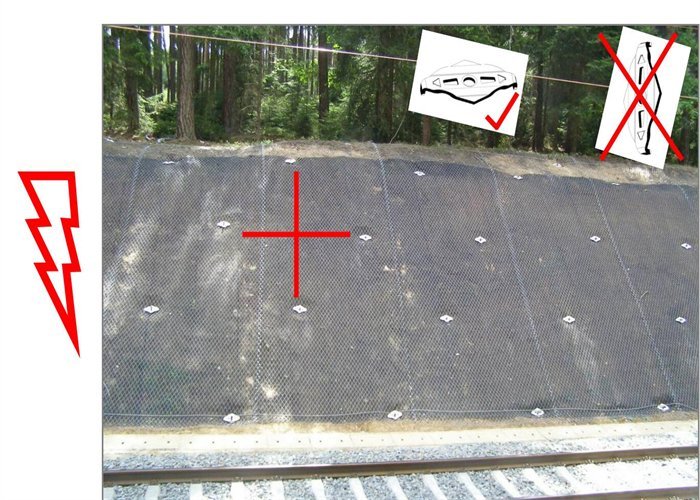
Ensure nails are staggered and spike plates are oriented correctly for maximum stability (Fig. 19).
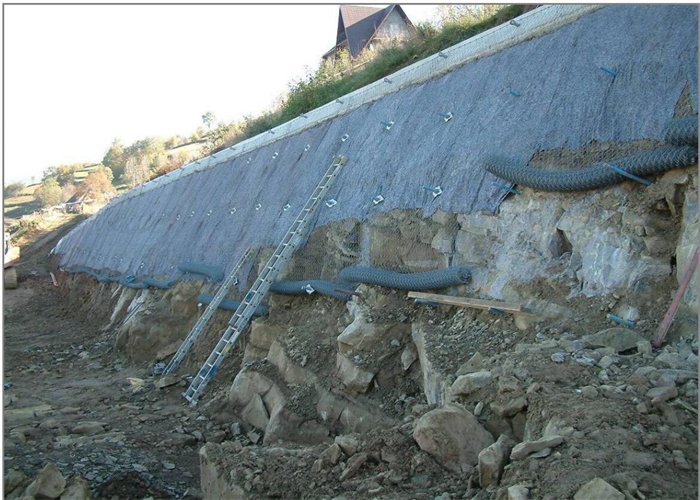
When unrolling the mesh, consider the “top-down” method for efficient installation on steep slopes (Figs. 20 & 21).
5. Making Connections and Final Adjustments
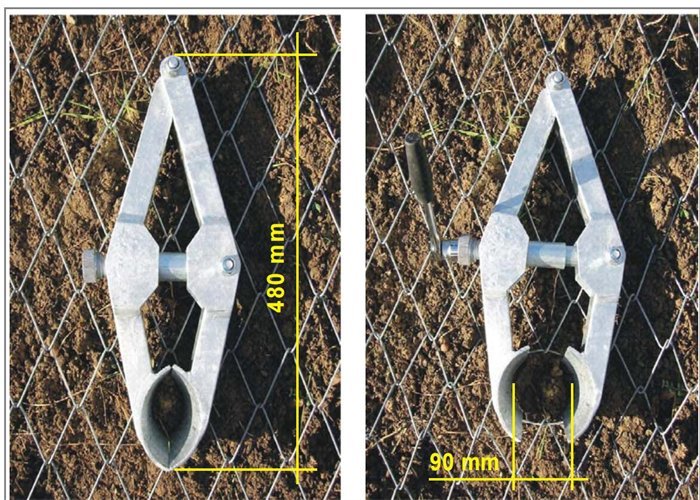
Utilize the TECCO drilling device for precise anchor installation through the mesh (Fig. 22).
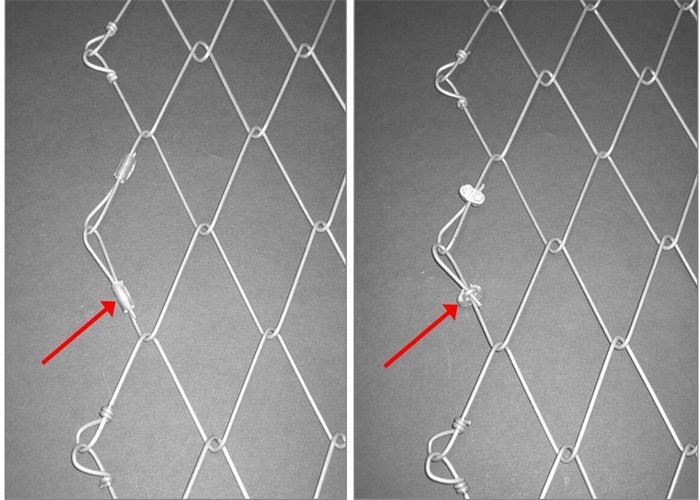
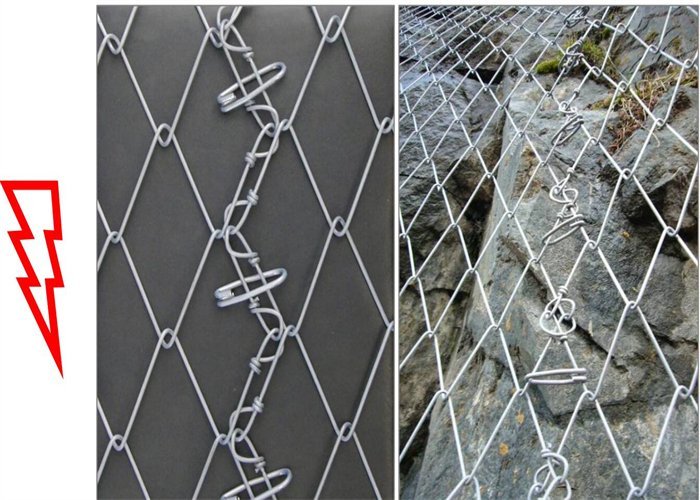
Secure horizontal connections with wire spirals and vertical connections without overlap for a seamless finish (Figs. 23 to 25).
6. Ensuring System Integrity-tecco mesh installation manual
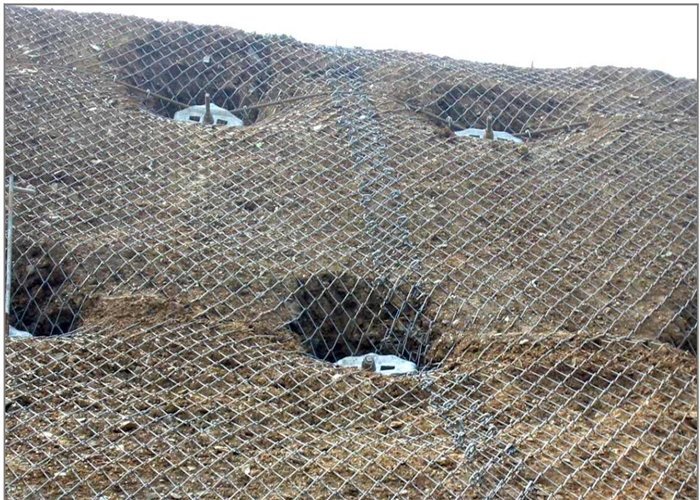
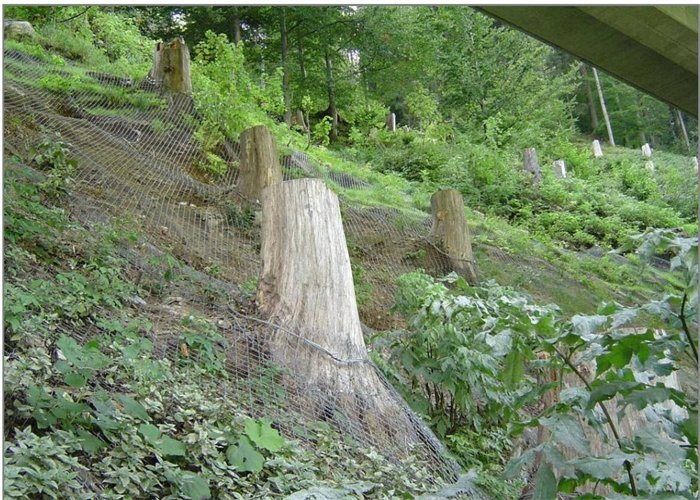
Once installed, the BMP TECCO Mesh system should appear well-integrated into the slope, with all components correctly tensioned and anchored (Figs. 26 & 27).
7. Avoiding Common Mistakes
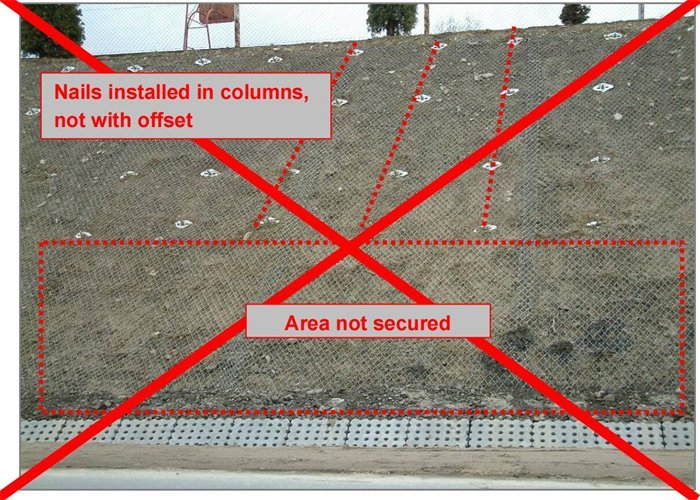
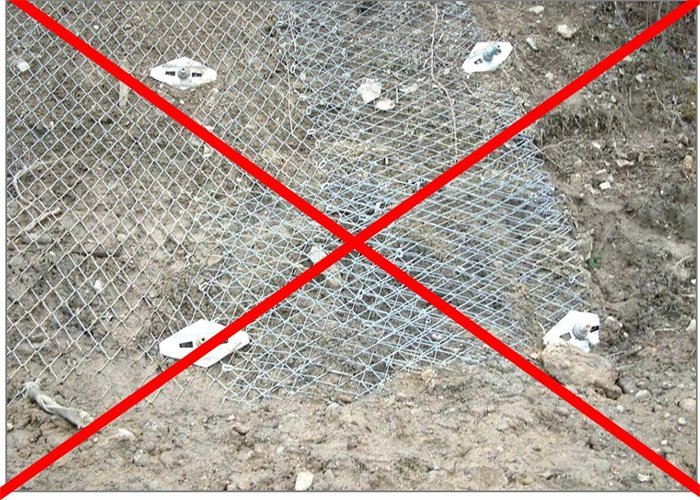
Avoid placing nails in straight columns without offset to ensure the system’s integrity (Fig. 28).
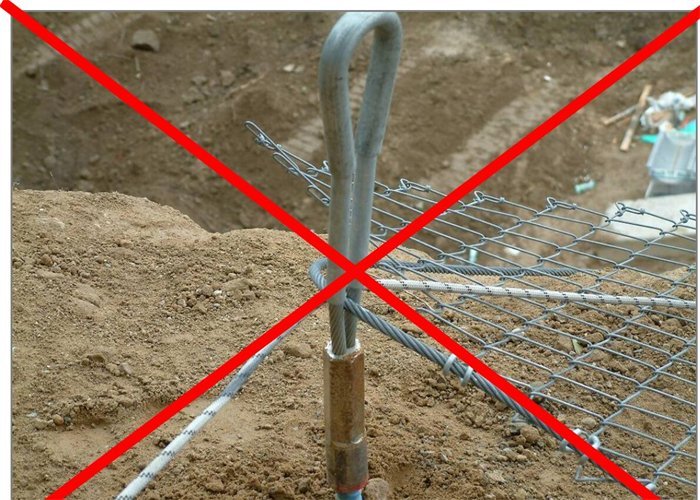
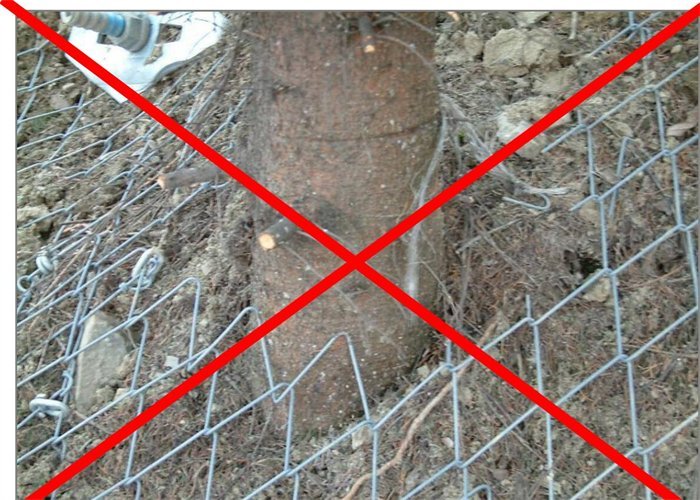
Ensure mesh sheets are connected correctly, and FLEX HEAD rope anchors are installed accurately to prevent system failure (Figs. 29 to 31).
8.Kindly Reminder: The Importance of Fig. 13 in Your BMP TECCO Mesh Installation
As you embark on installing your BMP TECCO Mesh for slope stabilization, we’d like to draw your attention to a particularly crucial step in the process: Fig. 13 – Unrolling and Fixation of the TECCO® Mesh. This step is vital for ensuring the mesh effectively covers the intended area, conforms precisely to the slope’s contours, and is adequately tensioned to withstand environmental pressures.
Proper execution of Fig. 13 lays a strong foundation for the entire installation, directly influencing the system’s performance and the longevity of your slope stabilization efforts. Please take extra care during this phase to guarantee the best possible protection against erosion and landslides.
Remember, the success of your project hinges on the meticulous application of each step, especially the unrolling and securing of the TECCO® Mesh. Should you have any questions or require assistance, our team is always here to support you.
Thank you for choosing our BMP TECCO Mesh system. We’re committed to helping you achieve effective and durable slope stabilization solutions.
9. Conclusion
By following these detailed steps, you can successfully install the BMP tecco mesh installation manual, providing effective slope stabilization and erosion control. This guide ensures that your installation process is smooth, from site preparation to the final greening stage, enhancing the longevity and durability of your geotechnical project.
 BMP Slope Protection